The Drone
January 13th:
This idea is the project that my friend, Alex Lin, and I are working towards, and hope to complete for the AT&T Arduino Competition. As soon as we heard about this competition, we knew we wanted to do something cool, something we would really enjoy doing. The thing that came to mind was building a drone. So I did a little research into the subject. What we decided we wanted to build is a drone that can stay aloft for days at a time, fly at relatively high altitudes, and fly silently. After reading articles the BBC had published about the U.S.military ventures into drone territory, I realized that the aspect that the U.S. drone fleet lacked was continued surveillance over a large area. The current drones the U.S. military employs are the iconic predator drones. Unfortunately, these can only stay aloft in between 3 and 18 hours (depending on the payload) before having to return to base, and they aren't exactly quiet. While satellites are an all-seeing silent eye, they cover a broad-expanse of land and produce images that aren't particularly specific or detailed. The predator drones can achieve more detailed images of specific locations or persons, but they can only do so for so long. The military lacks a drone that could stay aloft for extended periods of time, and could produce detailed images, like a drone, or more broad images, such as that of a satellite. To fulfill this role, I began designing the LTA-UAV (Lighter-than-air unmanned-aerial-vehicle), or LTAV for short. My first rudimentary design is shown below. I presented this to my partner, and we began to design it in more detail.
To accomplish our mission, the LTAV will fly thanks to a helium-filled envelope, of as-yet undetermined size, which will be able to lift 100 percent of the drone's weight. To move, the drone will use four electric brushless motors with propellors attached, all connected to a simple Arduino Uno. The Uno will control the motors via ESCs, and will receive it's orders through an XBee Pro shield, capable of transmitting from six miles away. The drone's engines and undercarriage will all be built around the envelope, providing maximum maneuverability. The undercarriage will contain the Uno, the Li-Po batteries, and the camera (of undecided make). The first thing I did in the design process was mock it up in Google SketchUp, shown below.
February 26th:
As of now, we have not begun work on this project. We plan to begin building it in another week or two, as we are currently learning the mechanisms needed to make this project work by re-conditioning the hovercraft, which is posted in a different section. So far we have learned how to make an Arduino converse with an ESC and how to get the ESC to control the motors, all of which is information vital to the development of this project.
February 28th:
While working on the hovercraft today, we connected an XBee to the Arduino, which allows us to control the hovercraft like a remote control toy. We plan to do the same thing with the LTAV, albeit with an XBee with a range of six miles as opposed to fifty feet.April 1st:
A lot has changed since I last updated this. First off, the design has undergone radical change. Instead of the previous model, it will instead be looking more like this:I admit, it's a little less attractive (ok, a lot less attractive), but it works with the parameters we are given. We have to make use of multiple balloons, as we can't order a custom envelope, and so the balloons will be held under mesh-netting, which is connected to the long aluminum panels that you can see in the above model. In addition, instead of using an XBee shield to control the motors, we will be using a standard, 8-channel RC module, which gives us greater control over the vehicle. Instead of a video transmitter, we will be using an Arduino 3GS shield, which will allow us to stream live video from the drone to our computer or phone. Today we constructed the frame, and are now ready to begin installing the batteries and hardware.
The frame itself is made out of wooden dowels connected via PVC piping. It is constructed in a cross structure held together by a square lash made out of para cord. The side panels are aluminum gutter siding that I picked up at Home Depot. It is extremely light and durable, which makes mounting very easy.
We also changed the name from LTAV to I.R.I.S., an acronym meaning Intelligent Reconnaissance In the Sky.
April 4th:
Earlier this week, we received the DX8 remote and receiver package, which came with this monster:
I successfully re-configured the controller to work with the four motors the drone will be using. The motor has a half-mile range, giving us more than enough room to take some great photographs. Today I hooked it up to the motors and ESCs. Here is the result:
April 11th:
As of today, the majority of frame construction has been finished. We have followed the design shown in SketchUp above, and all of the electronics seem to be working fine. We plan to run a test flight this weekend, at my school's ultimate tournament, the Paideia Cup. I will keep you posted on how it goes!
April 13th:
We've had a rather disappointing development. On our first test flight, the drone was absolutely shredded. The wind gusted at 25 mph, and before we could even get it off the ground, the frame buckled. We're two weeks out from the Arduino competition and it looks like we will be starting from scratch.
April 15th:
Good news! We have come up with a new design, which is much more closely related to our original idea of what we wanted I.R.I.S. to look like. Here's a mockup I made in Google SketchUp:
We will be beginning construction immediately, as we want to have this tested and ready to go by the competition. Unfortunately, the Arduino 3G/GPS Shield has still not arrived yet. We hope to get it in by next week.
April 17th:
We have successfully constructed the new frame. Below are a few pictures of the finished frame, with my partner Alex Lin in the picture for scale.
We connected the motors to the frame using small metal L-brackets, and connected the dowels to the wooden slats by screwing directly into the top of them using small screws, as shown below.
In the picture below, you can see that we used high-tension fishing line to give the motor units some extra support. This allowed for less tension to be put on the center dowel.
In the picture below is our beautiful wiring job, complete with that tidy looking bundle in the center. This consisted of four ESCs, two Li-Po batteries, and the RC receiver array.
Below is me working on tying the netting to the frame to hold our balloon in.
Below is another picture of the finished frame. You can also see the netting attached to the first pocket of the frame.
The design behind this frame is meant to make it much more sturdy and able to bear the weight of the electronics and any other stress that weather conditions might throw at it. To hold the balloons in the compartments, which you can see above, we are using some standard garden netting (that is used to keep birds and other pests out), which we will stretch across the frame. The competition is this Friday, and we still haven't received the Arduino shield from the company. We're cutting it close, hopefully it will get here on time.
April 18th:
Ok, some good news and bad news, the night before the competition. We finally received our Arduino shield. The bad news is that they didn't send us the antenna to make it work. So we will be going into the competition with working code, but a nonfunctional Arduino shield that this entire project revolved around. We have finished our power point and poster for presentation, and in addition to I.R.I.S. we will be demonstrating our first project, the hovercraft. Wish us luck tomorrow, and I will keep you posted!
April 19th (AT&T Arduino Competition)
Today was quite eventful. We arrived at the competition with drone and hovercraft in tow. The competition was hosted at the AT&T corporate head quarters. There were over twenty projects being displayed, and the competition was looking tough. We chose a table and began to set up. We hit a few bumps right away: the large monitor we planned on using wasn't compatible with my Mac, and there was a strong breeze in the large, open room, which meant that we really couldn't fly I.R.I.S. at the heights we wanted to. Also, we learned that our mathematical expectations do not always apply to real situations, and ended up adding two additional balloons to the design to ensure that it would fly. We think that the issue was that the two original balloons were not filled to their maximum potential, and that the helium had become diluted with air during the inflation process. Below is a picture of our display, the hovercraft, and the final version of the I.R.I.S. model that we demonstrated.
You can see the additional last-minute addition of the two balloons in the photos above.
We were the final project to be pitched to the judges, and at the time we felt pretty good about it. The power point went without a hitch, the hovercraft worked flawlessly, and we got I.R.I.S. hovering quite nicely. The judges then left for an hour and a half of deliberation. Below is a video version of the power point (without voice over, so unfortunately the full effect isn't there) and a video of I.R.I.S. hovering.
As you can see in the video below, there was a rather strong breeze from the air conditioning ducts that was tossing I.R.I.S. around, so for the sake of safety my partner and I stepped in to add a stabilizing hand.
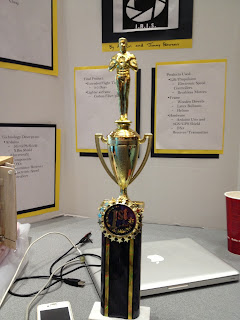
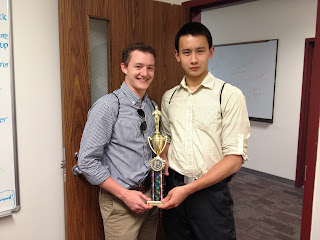
After an hour and a half, the judges returned, and began to give their own personal highlights of the competition. Among these was an automated dog food dispenser, a motion-sensitive jacket, and a mechanized chess board. I.R.I.S. wasn't mentioned once. They then began to award the first, second, and third prizes. Third place went to a home-made piano and second place went to a smart home security system. We figured we didn't have a chance after they hadn't even mentioned our project, so you can imagine our surprise when we won first place!


No comments:
Post a Comment